You already know you want an airless pump bottle for your next skincare product. Maybe you have a design file ready. Maybe you have a reference image from a competitor’s product. Or maybe you simply know what formula you want to fill and you need someone to recommend the right bottle.
Whatever stage you are at, this guide walks you through the decisions that matter — shape, capacity, outer shell material, cap style, and surface decoration — so you can move from idea to sample request faster, without the back-and-forth that wastes everyone’s time.
We wrote this from the factory side. The data below comes from our actual product catalog — not from assumptions or industry averages.
Which Skincare Products Work Best in an Airless Pump Bottle?
Not every skincare product needs airless packaging. If your formula is a simple body wash or a shampoo, a standard pump bottle with a dip tube works fine and costs less.
Airless packaging makes a real difference when your formula meets one or more of these conditions:
Contains active ingredients sensitive to air. Formulas built around Vitamin C, retinol, niacinamide, or peptides lose effectiveness when repeatedly exposed to oxygen. An airless system pushes product upward using an internal piston — no air enters the bottle during use.
Is a cream, serum, or emulsion with higher viscosity. Thick formulas do not flow well through a dip tube. The piston mechanism in an airless bottle pushes the product upward consistently, so consumers get a smooth, even pump from first use to last.
Needs precise dosage per pump. Each of our airless pump models has a calibrated discharge rate. For example, our treatment pump models deliver 0.10ml per stroke — designed for eye serums and concentrated formulas where applying too much product is a waste. Our standard models deliver 0.25ml per stroke, suitable for daily face creams and lotions.
Targets a premium or clean beauty positioning. Airless bottles look and feel like a higher-end product. They also reduce the amount of preservatives your formula needs, because the product never contacts air or fingers — something clean beauty brands care about.
If your product is a lightweight toner, micellar water, or spray-type formula, consider our fine mist spray bottles instead. Airless technology works best for creams, serums, lotions, emulsions, and gel-cream textures.
Shapes: Round vs. Square — Matching the Bottle to Your Brand Style
Most airless pump bottles come in a cylindrical (round) shape. This is not a limitation — it is a function of how the internal piston mechanism works. The piston needs to travel upward in a uniform channel to create the vacuum seal. Round shapes provide the most consistent seal and smoothest piston travel.
Round bottles account for the majority of our orders. They suit nearly every brand aesthetic — from minimalist clean beauty to luxury skincare — depending on how you customize the surface finish and cap.
Square bottles are available but in a more limited range of models. They have a distinctive shelf presence that stands out in retail environments. Keep in mind that square airless bottles typically cost slightly more due to tighter manufacturing tolerances on the piston fit.
Practical tip: If you are designing a product line (serum + cream + toner set), round airless bottles pair naturally with round lotion bottles and cream jars from the same product family. This creates a cohesive look across your entire skincare line without requiring custom molds.
Sizes: 15ml to 200ml — How to Pick the Right Capacity
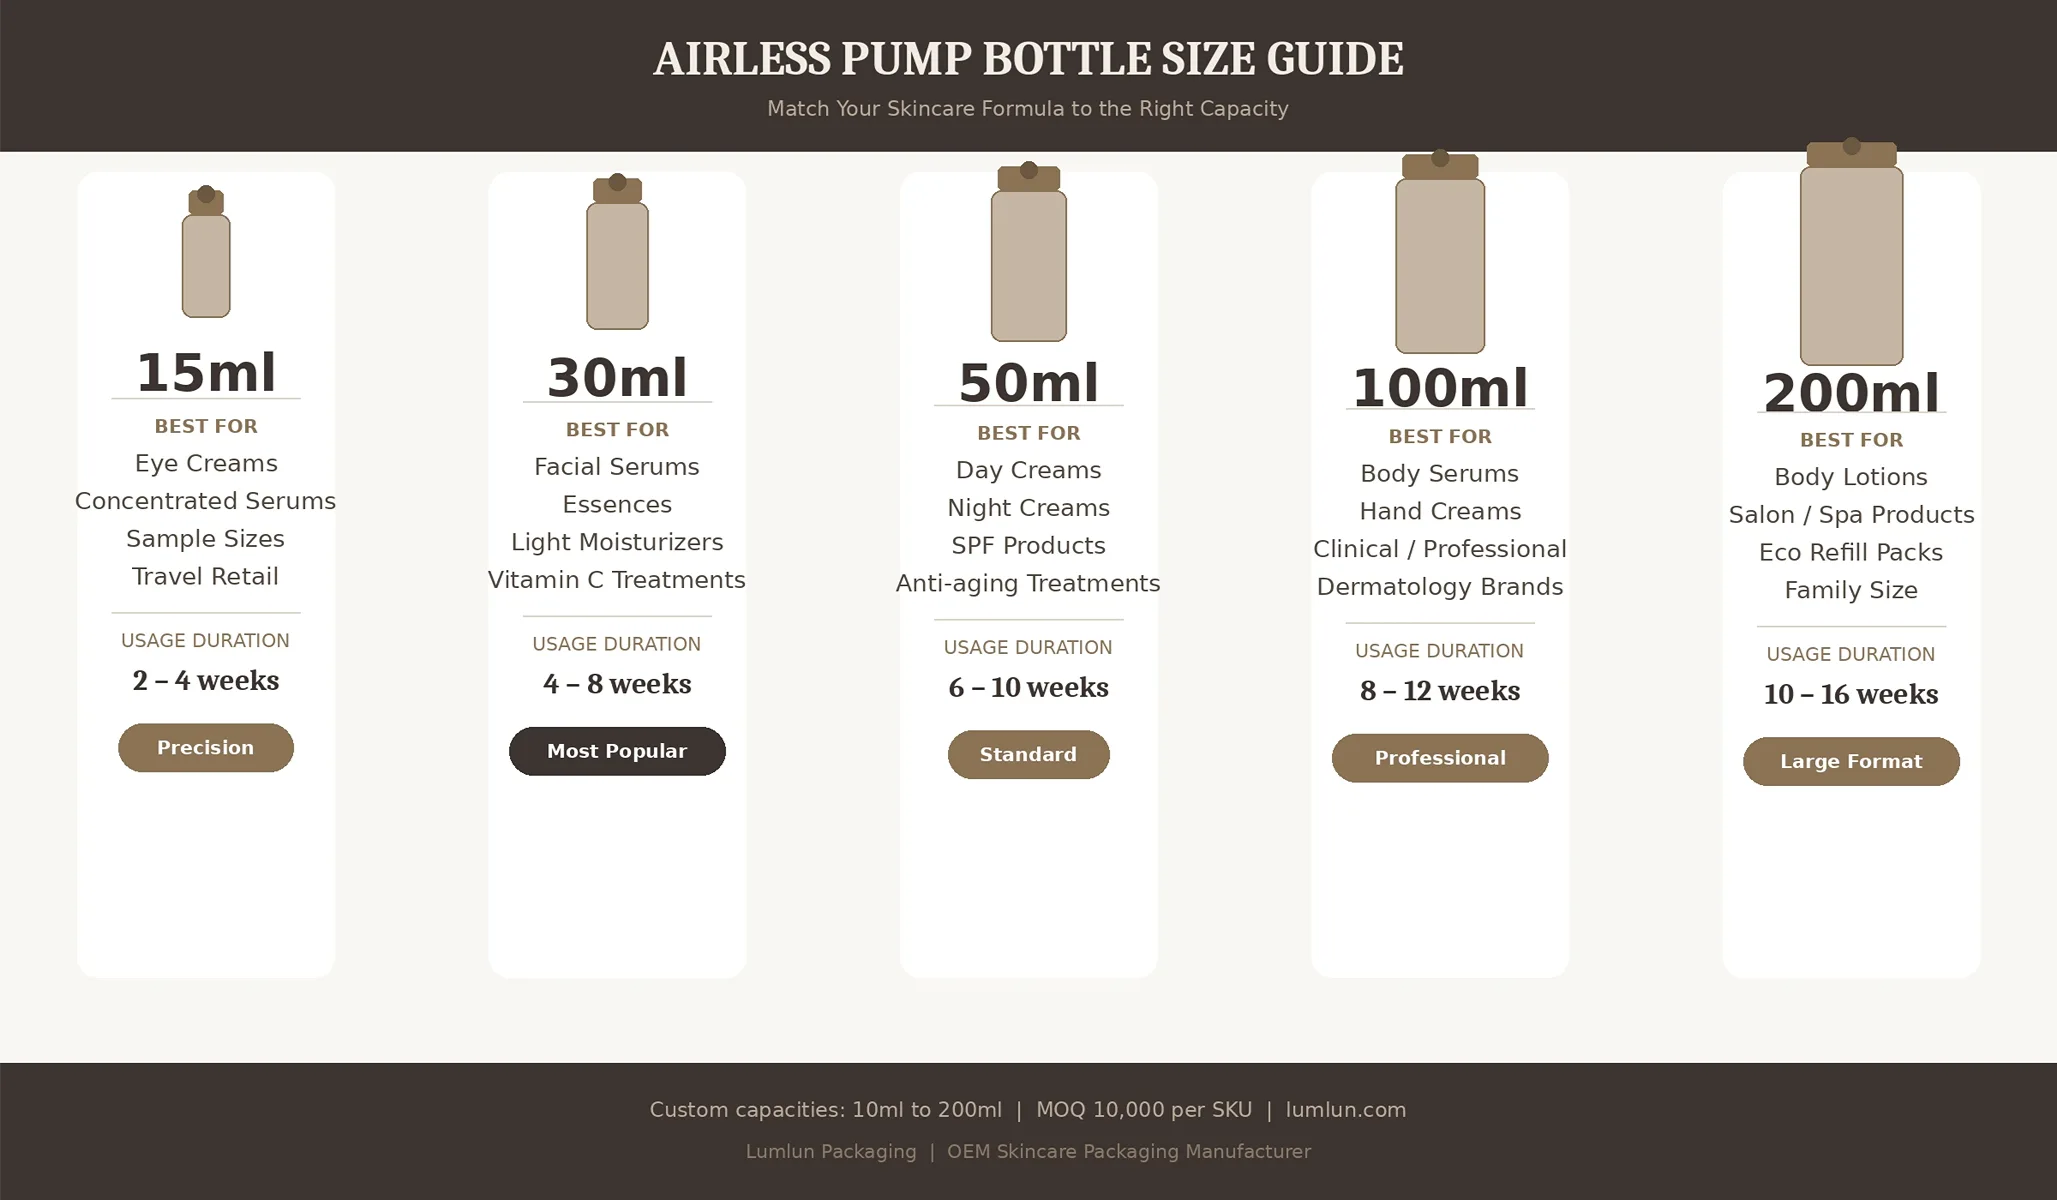
Our most commonly ordered airless bottle sizes are 15ml, 30ml, and 50ml. These three sizes cover the vast majority of skincare applications:
5ml – 15ml: Eye creams, concentrated serums, sample sizes, and travel retail. Our fine treatment pump series is specifically designed for this range, delivering 0.10ml per stroke for precise application.
30ml: The most popular size for facial serums, essences, and lightweight moisturizers. This capacity balances shelf life, retail pricing, and consumer usage habits — most consumers finish a 30ml serum within 4 to 8 weeks of daily use.
50ml: Standard for day creams, night creams, and moisturizers. Also popular for SPF products and anti-aging treatments where consumers apply a slightly larger amount per use.
80ml – 100ml: Body serums, hand creams in airless format, or clinical/professional-size packaging for dermatology brands.
120ml – 200ml: Large-format airless bottles for body lotions and professional-use products. Our Mono PP series supports capacities up to 200ml with a choice of multiple actuator styles.
We support custom capacities from 10ml to 200ml. If you have a specific volume requirement, we can recommend the closest model from our existing mold library to avoid the cost and lead time of custom tooling.
Outer Shell Materials: What They Look Like and How They Feel
The inner bottle (the part that holds your formula) is almost always PP (polypropylene) — it is chemically stable, lightweight, and does not react with cosmetic formulas.
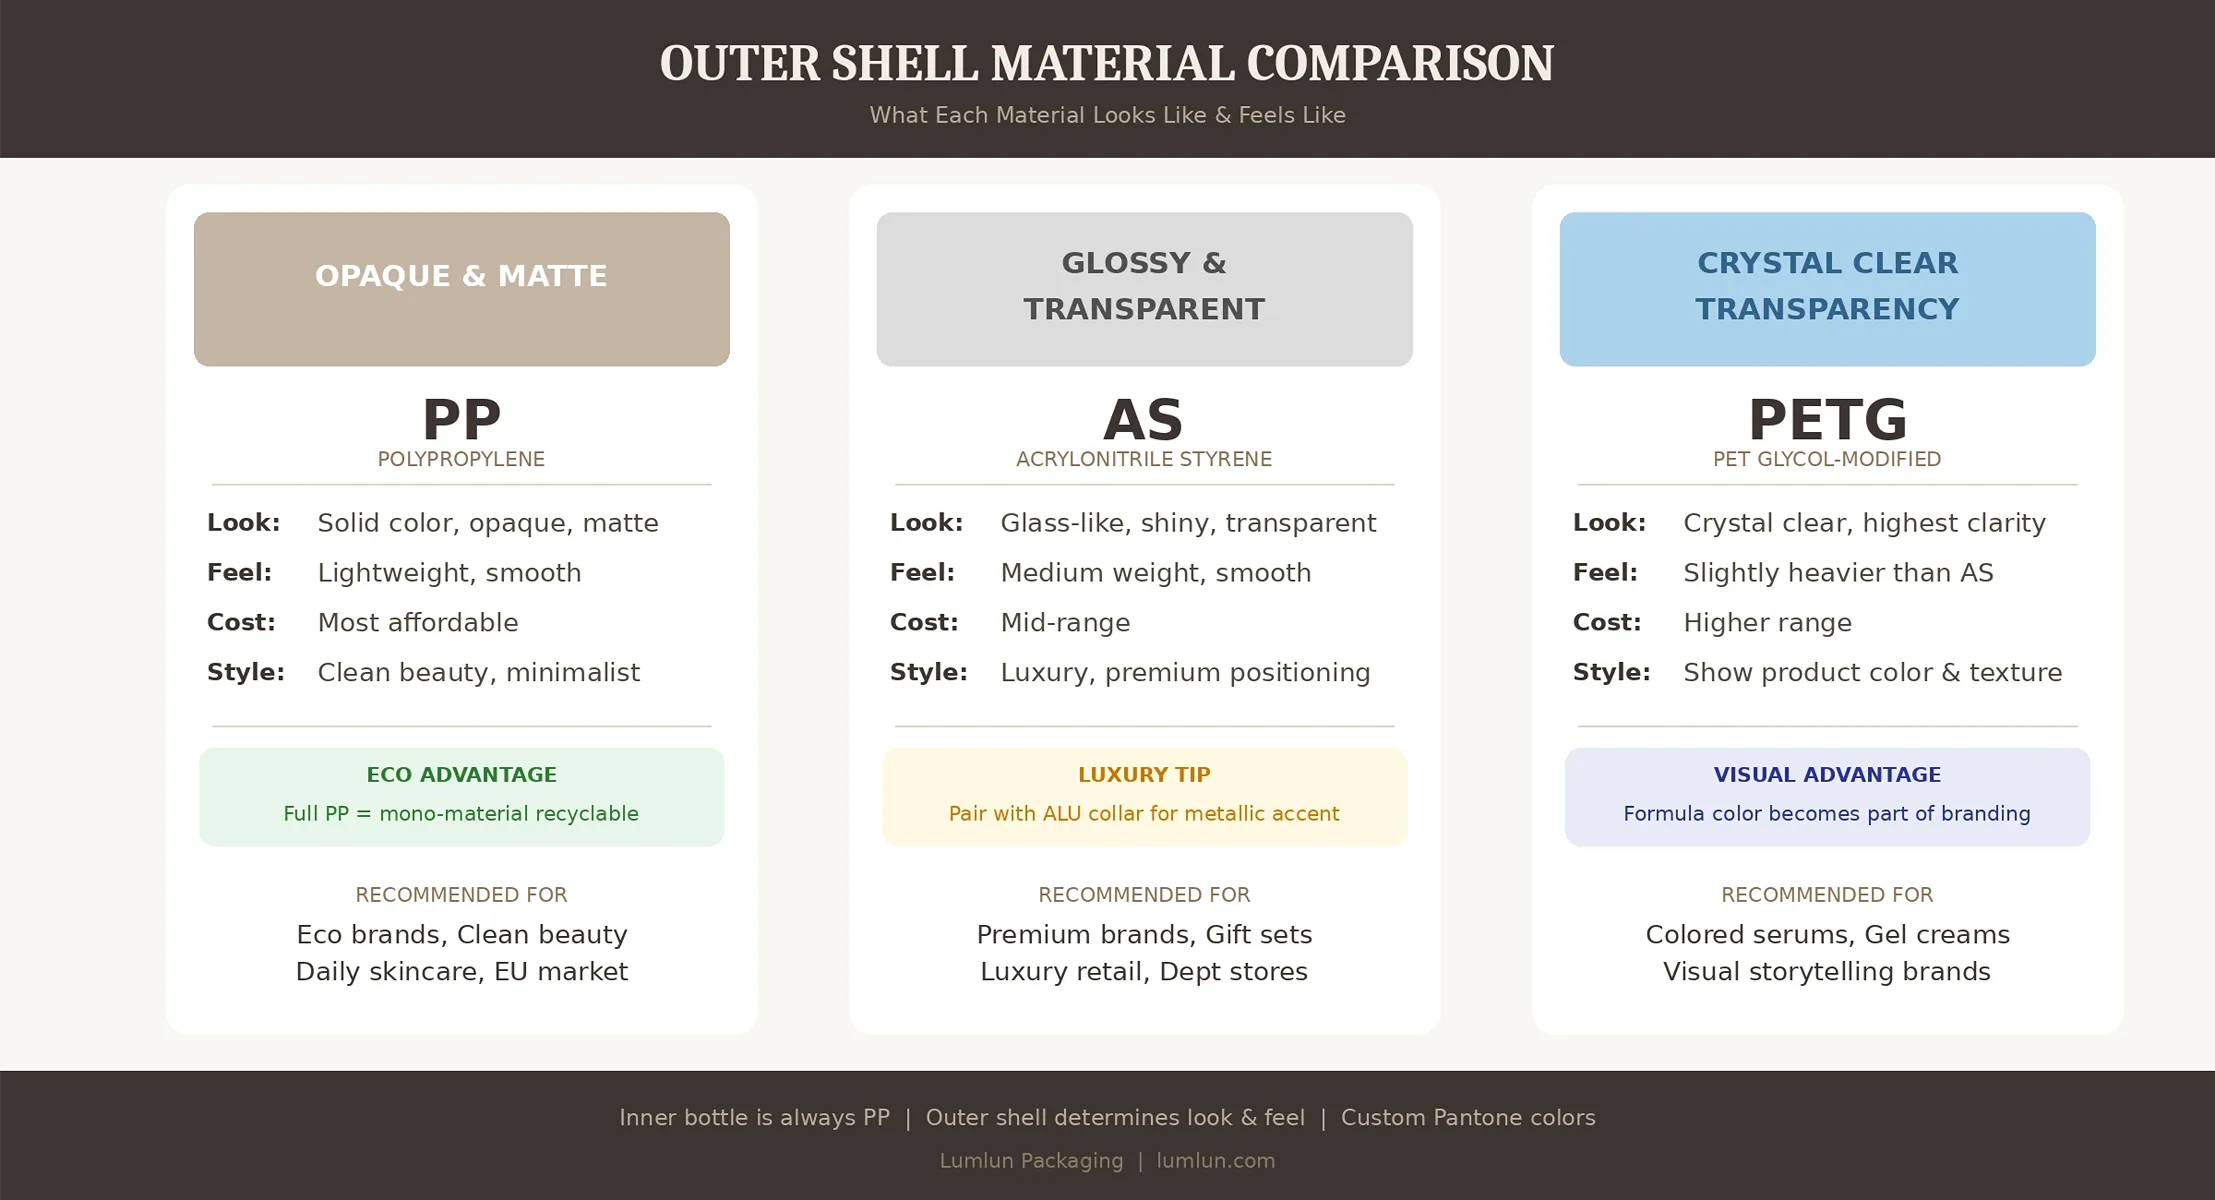
What changes between models is the outer shell — the part your customer sees and touches. This is where branding happens. Here is what each material looks like in practice:
PP outer shell — Matte, opaque, solid-color finish. Clean and minimal. Cannot be made transparent. This is the most cost-effective option and the standard choice for brands that want a simple, modern look. When the entire bottle (inner + outer + pump) is PP, it becomes a mono-material design — fully recyclable as a single unit. This is increasingly important for brands selling into the EU market, where the PPWR regulation is tightening recyclability requirements.
AS (Acrylonitrile Styrene) outer shell — Glossy, transparent or semi-transparent. Gives the bottle a glass-like appearance at a fraction of the weight and cost. Very popular for luxury and premium-positioned brands. Can be combined with an aluminum (ALU) collar and base for a high-end metallic accent.
PETG outer shell — Crystal clear transparency, even higher optical clarity than AS. Best for brands that want the consumer to see the product color or texture through the bottle wall. Slightly higher cost than AS.
MS / PMMA outer shell — Premium-grade clarity with heavier weight. Used in our higher-end cosmetic set models. Feels substantial in the hand — similar to a glass bottle but shatter-resistant.
Quick Decision Guide
| If your brand needs… | Choose this outer shell |
|---|---|
| Simple, clean, eco-friendly look | PP (matte, opaque) |
| Luxury transparent appearance | AS (glossy, glass-like) |
| Show the product color inside | PETG (crystal clear) |
| Premium weight, glass-like feel | MS or PMMA |
| Metallic luxury accents | AS or PETG + ALU collar and base |
Cap Styles and Actuator Options
Cap style affects both the appearance and the user experience of the bottle. Our airless bottles come with two main closure types:
Screw-on cap — The cap twists on and off. Feels more secure and premium. Commonly used on luxury skincare lines.
Snap-on cap — The cap clicks on and off. Faster to open and close. Slightly more casual feel, often preferred for daily-use products where convenience matters.
Beyond the cap, each model offers multiple actuator options — the pump head itself. Different actuator shapes affect how the bottle looks and feels in the hand. Depending on the model, you can choose from a standard press pump, a flat-top pump, an aluminum finish pump, or even a spray pump option.
Some of our models also support a rotary (twist) mechanism instead of a press pump — the product dispenses when you turn the top section. This is a premium option that adds a distinctive user experience.
Printing and Surface Decoration: Making the Bottle Yours
This is where your bottle stops being a generic container and starts being your brand. We offer the following customization and surface treatments:
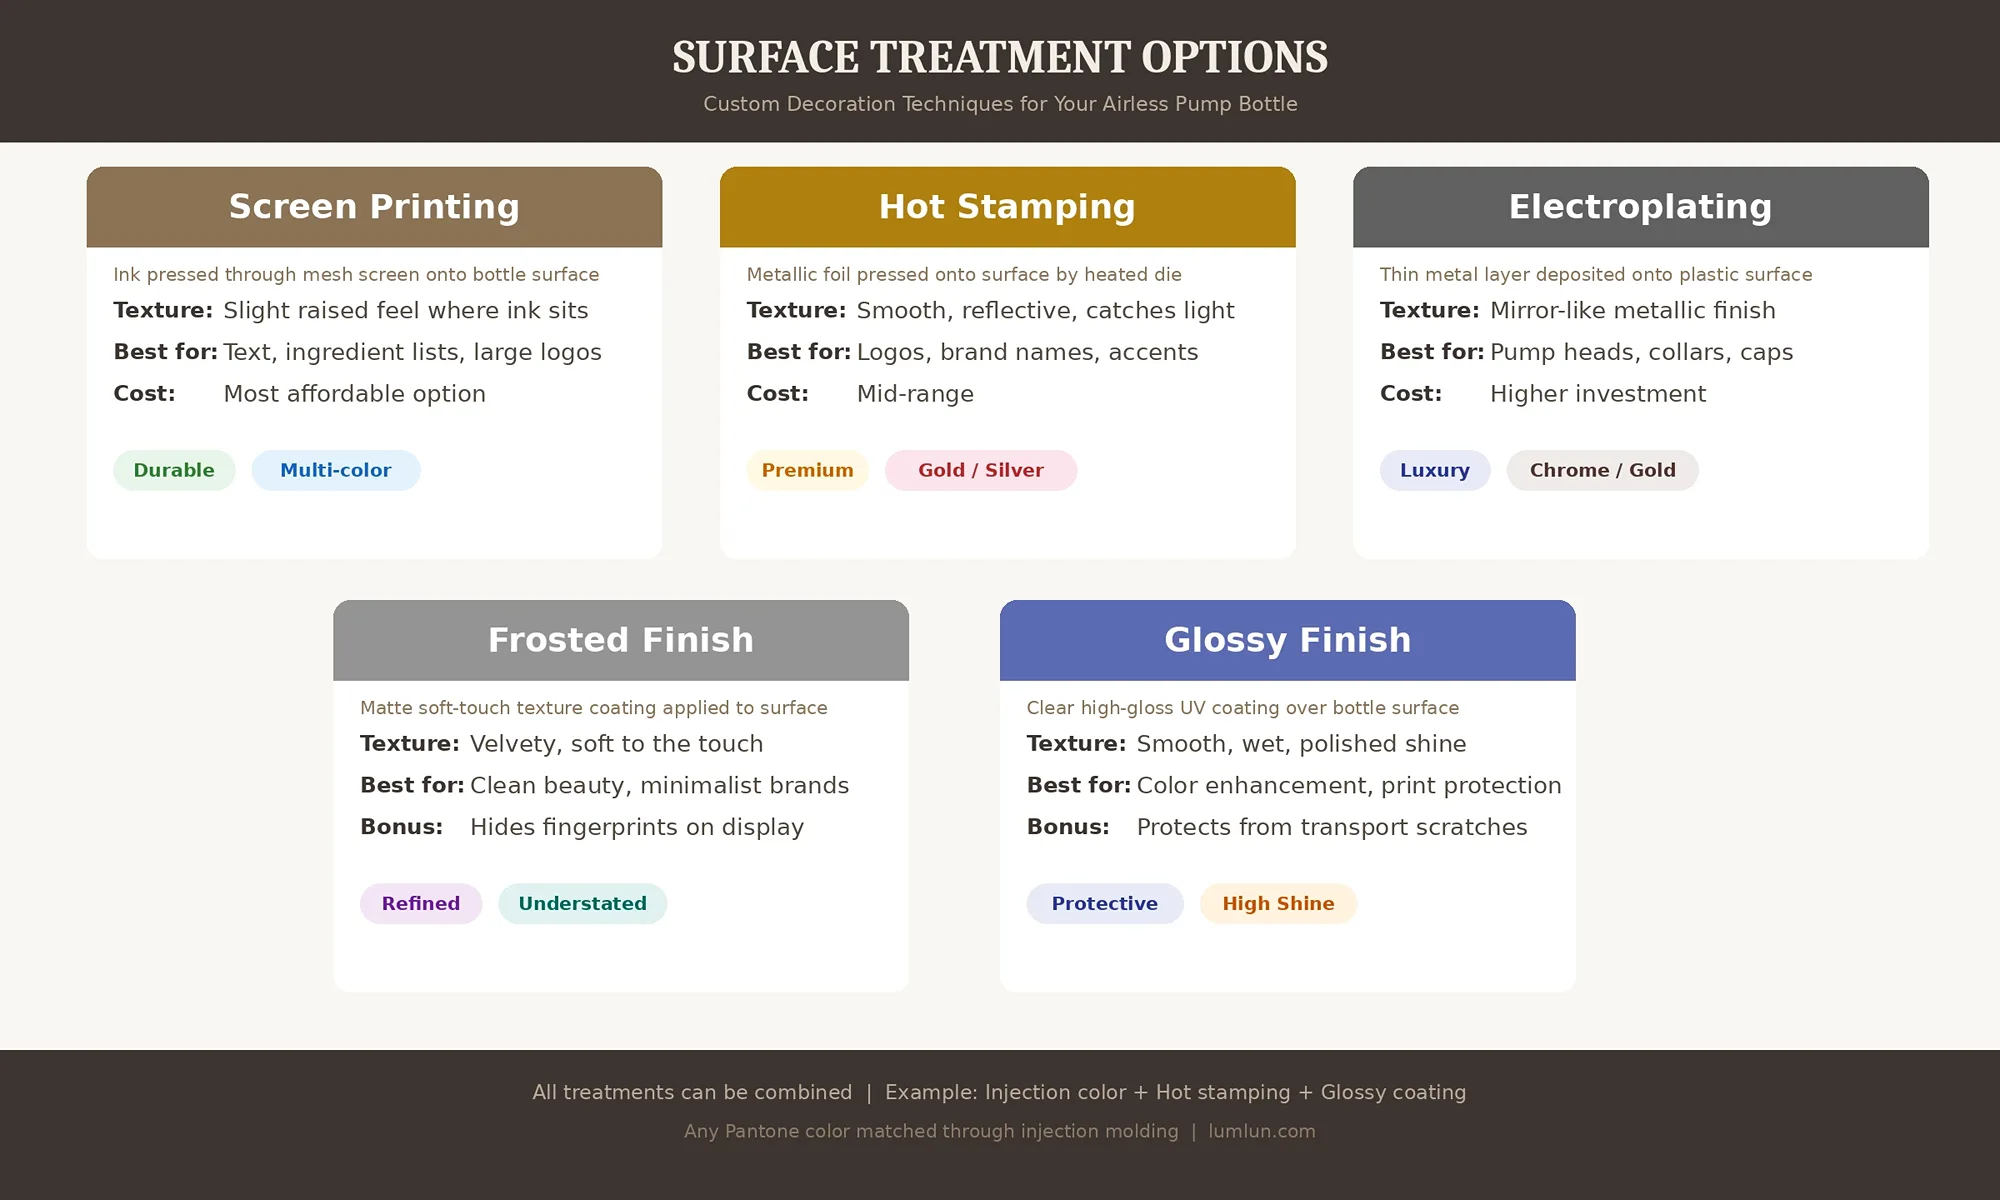
Screen Printing — Ink is pressed through a mesh screen onto the bottle surface. You can feel a slight texture where the ink sits. Best for text-heavy designs — ingredient lists, directions, brand name, product name. Durable, cost-effective, and suitable for large-area graphics. Works on PP, AS, PETG, and most other materials.
Hot Stamping — A heated die presses metallic foil (gold, silver, rose gold, or custom colors) onto the bottle surface. Creates a reflective, premium finish that catches light. Best for logos, brand names, and decorative accents. Hot stamping gives your bottle a luxury feel that screen printing alone cannot achieve.
Injection Color — The color is mixed directly into the plastic material during manufacturing. This means the color is part of the bottle itself — it will not scratch, peel, or fade over time. Any Pantone color can be matched. This is the foundation for most custom projects.
Electroplating — A thin layer of metal is deposited onto the bottle surface, creating a mirror-like metallic finish (gold, silver, chrome). Commonly applied to pump heads, collars, and caps rather than the full bottle. Adds significant luxury feel.
Frosted Finish — A matte, soft-touch texture applied to the bottle surface. Gives the bottle a refined, understated look. Popular with clean beauty and minimalist brands. The frosted surface also hides fingerprints — a practical advantage for retail display.
Glossy / UV Coating — A clear, high-gloss protective layer applied over the bottle. Intensifies colors and adds a wet, polished look. Often combined with screen printing or hot stamping to protect the printed surface from scratching during transport.
UV Printing — Digital printing that cures instantly under UV light. Supports full-color, photo-quality graphics directly on the bottle. Best for complex designs with gradients, images, or multiple colors where screen printing would require too many passes.
Special Product Lines: Beyond the Standard Airless Bottle
Beyond standard airless pump bottles, we manufacture several specialty designs that address specific market needs:
Mono-Material PP Airless Bottles — Every component — bottle, pump, cap, and spring — is made from PP. No metal parts. The entire unit can be recycled as a single material without disassembly. We offer both metal and PP spring options, so you can choose the version that matches your sustainability requirements. Our mono-material design holds a utility patent and APR (Association of Plastic Recyclers) certification. Read more in our detailed guide: Mono-Material PP Airless Bottles.
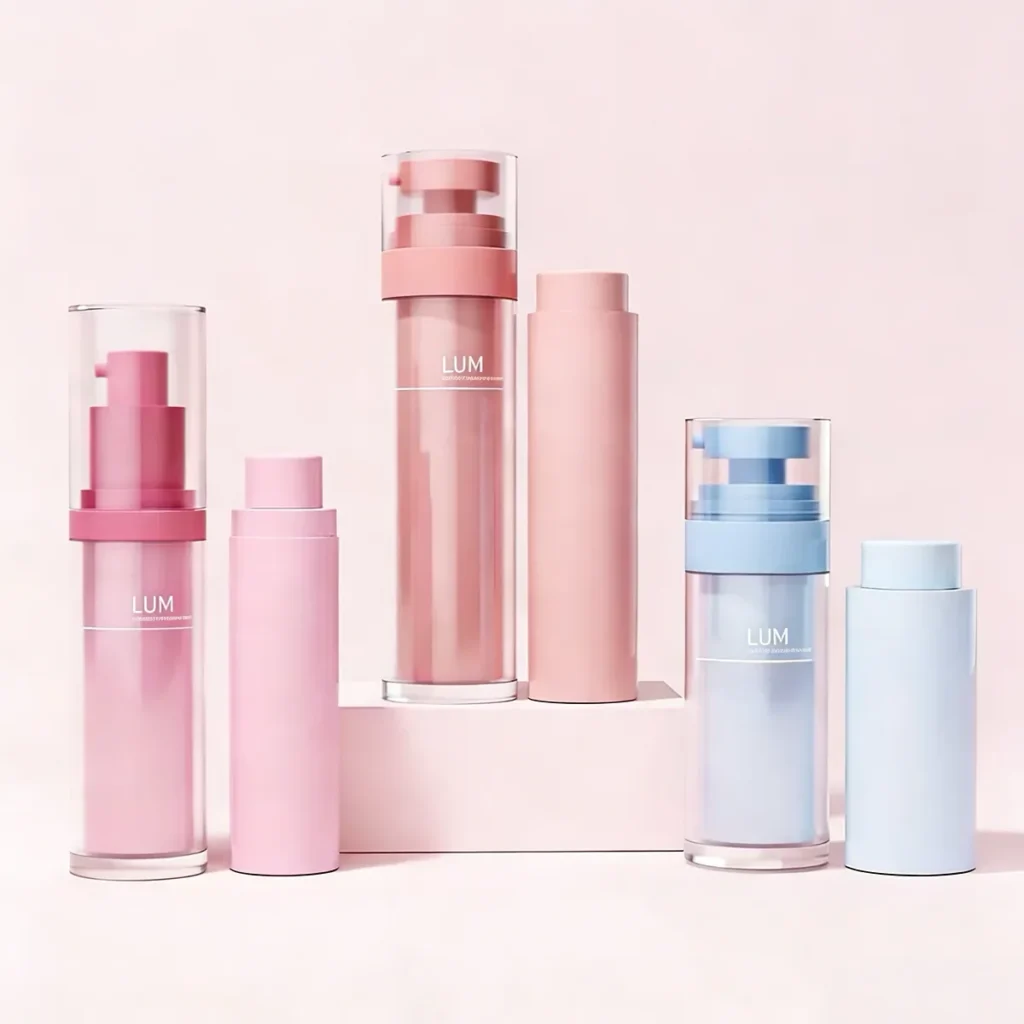
Refillable Airless Bottles — The inner bottle can be removed and replaced with a refill cartridge. The consumer keeps the outer shell and cap, reducing plastic waste per repurchase cycle. Available with TPE spring and PCR-compatible materials.
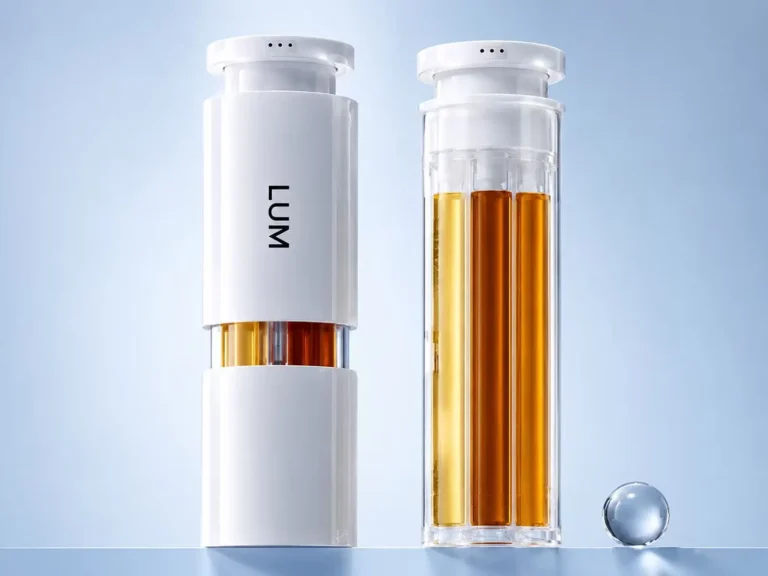
Popping Beads Airless Bottle — A patented design where decorative beads are visible inside the bottle wall, creating an eye-catching visual effect. All regular airless bottle series can be adapted into the popping beads format. Popular for gift sets and limited-edition skincare launches.
Mixing Bottle — A dual-chamber design where two ingredients are stored separately and mixed at the time of use. The cap contains a silo that can hold essential oil or powder (2.5ml capacity). When opened, the two components combine. Ideal for formulas where two active ingredients need to remain separated until application.
From Inquiry to Finished Product: What the Process Looks Like
Here is what actually happens after you contact us, step by step:
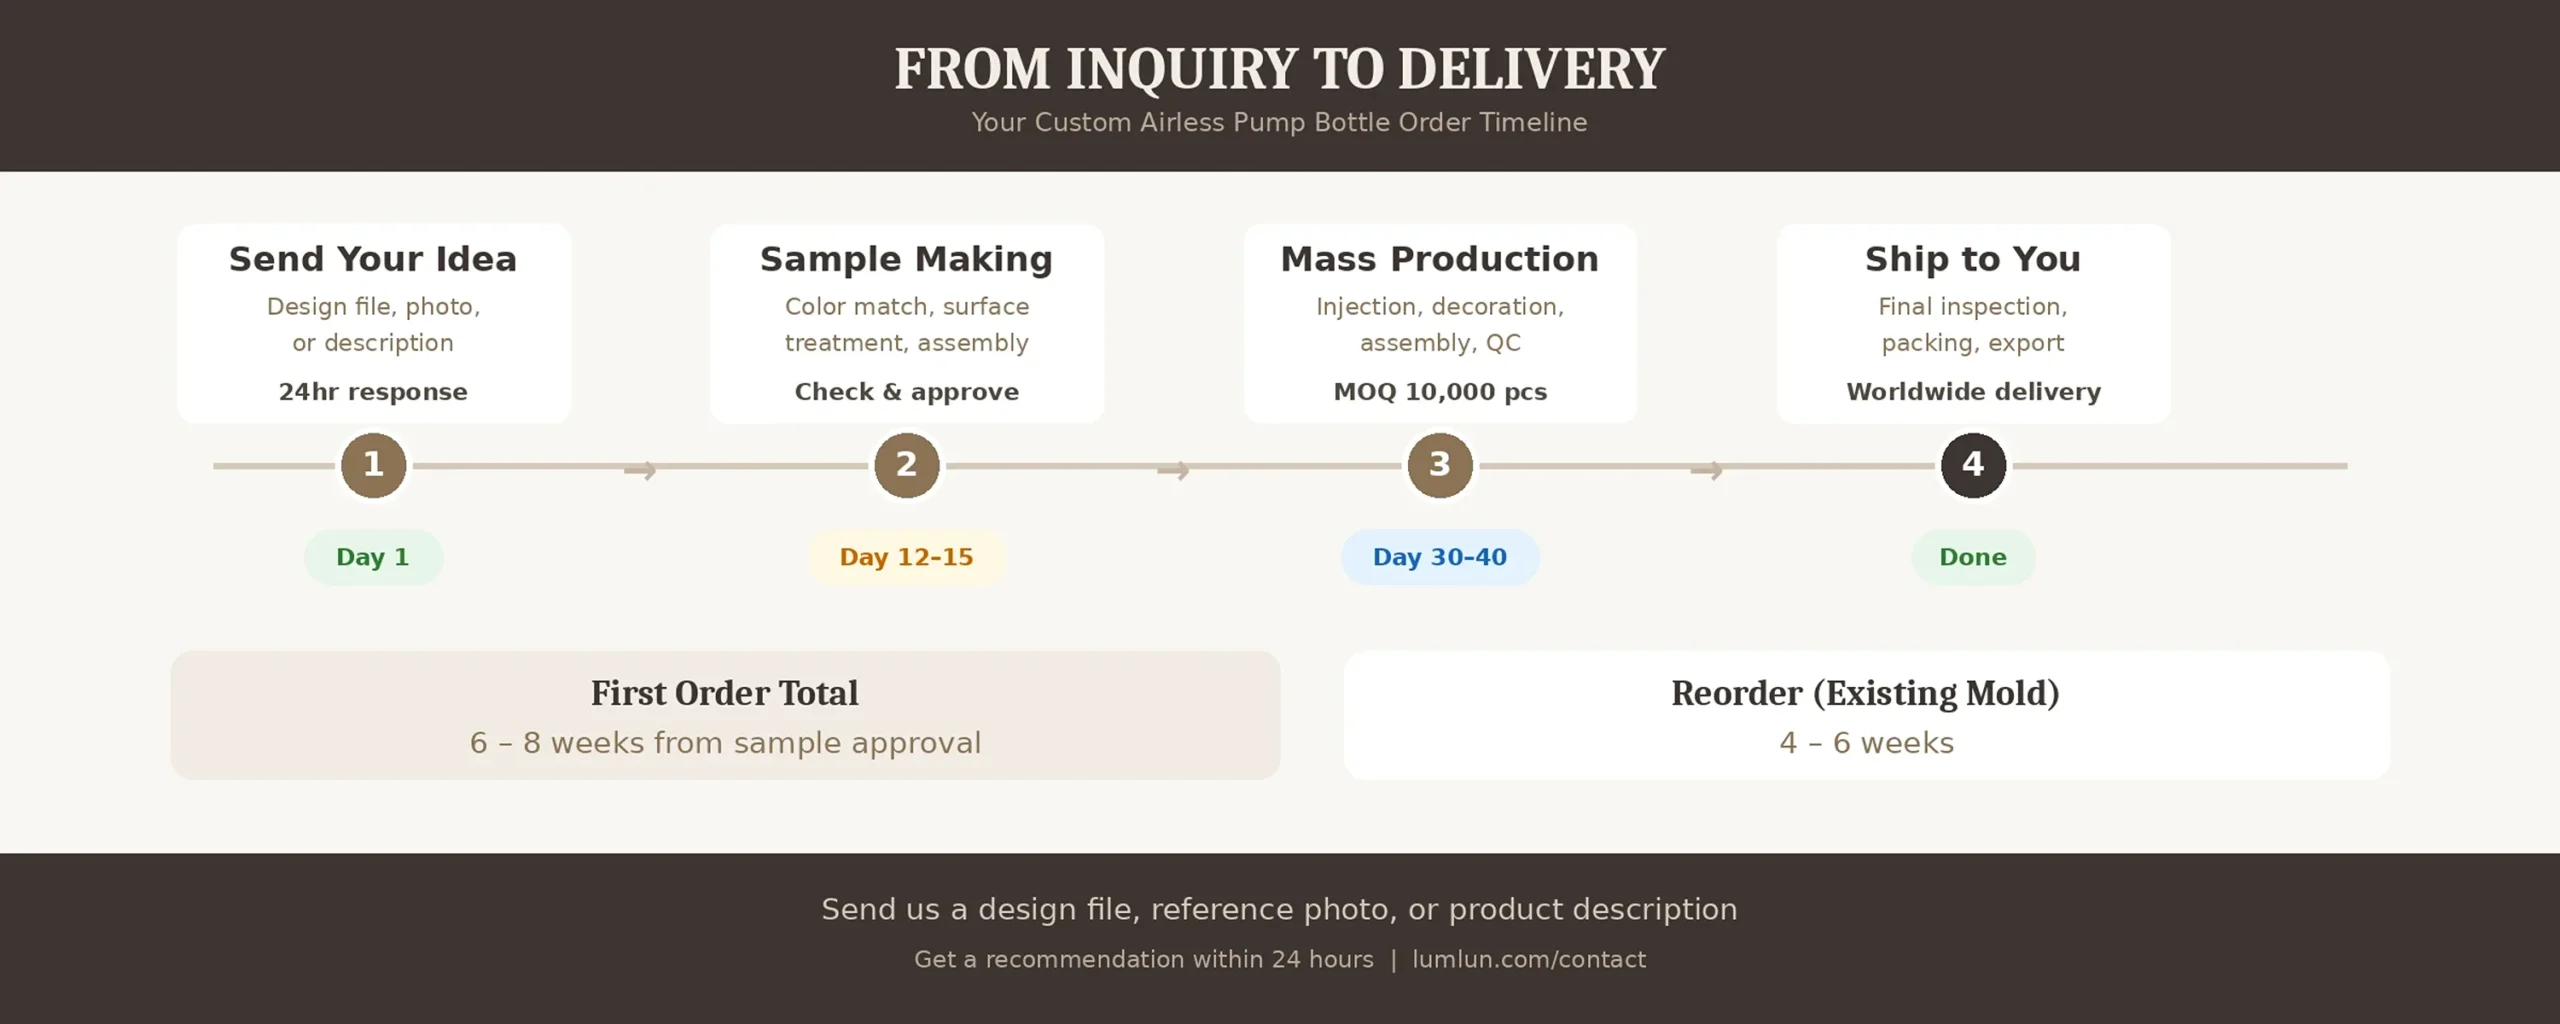
Step 1 — You tell us what you need (Day 1)
Send us one of the following: a design file (AI, PDF, or image), a reference photo of a bottle you like, or simply a description of your product (formula type, capacity, brand style). Our team responds within 24 hours with a recommendation from our existing mold library.
Step 2 — Sample confirmation (Day 12–15)
We produce physical samples based on your selected model, color, and surface treatment specifications. You receive samples to check fit, finish, color accuracy, pump feel, and cap closure. If adjustments are needed, we revise and resample.
Step 3 — Production (Day 30–40 after approval)
Once you approve the sample, mass production begins. Our standard MOQ is 10,000 units per SKU. During production, we run quality checks at every stage — injection molding, surface decoration, assembly, and final inspection.
Step 4 — Quality inspection and shipping
Finished goods are packed and prepared for export. We coordinate shipping logistics to your destination.
Total timeline for a first order: approximately 6 to 8 weeks from sample approval to shipment. Repeat orders with existing molds and confirmed specifications take 4 to 6 weeks.
Ready to start your project? Send us your design file, reference photo, or product description — we will recommend the right airless bottle from our catalog within 24 hours.
→ Contact Us | → Chat on WhatsApp
Frequently Asked Questions
What is the minimum order quantity for custom airless pump bottles?
Our standard MOQ is 10,000 units per SKU. This applies to custom color, printing, and surface treatment orders. The MOQ covers mold setup and production run efficiency.
Can you match a bottle I found from another brand?
Yes. Send us a photo or a link, and we will identify the closest model from our existing product range. If we have a matching or similar mold, you avoid the cost and lead time of custom tooling entirely. This is the most common way our clients start a project.
What sizes are available for airless pump bottles?
Our standard range covers 5ml to 200ml. The most popular sizes are 15ml, 30ml, and 50ml. We can recommend the best capacity based on your formula type and target use.
How long does it take to receive samples?
Sample production takes 12 to 15 business days. This includes color matching, surface treatment application, and assembly.
Do you offer eco-friendly or recyclable airless bottle options?
Yes. Our Mono-Material PP series uses an all-PP construction including the pump spring — making the entire bottle recyclable as a single material. We also offer refillable designs where consumers replace only the inner cartridge. PCR (post-consumer recycled) material is available upon request.